

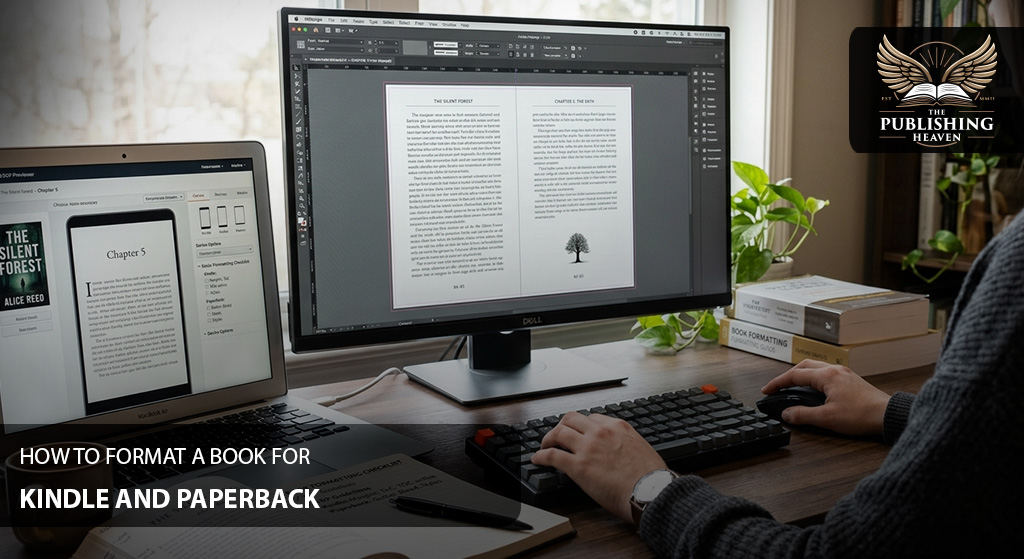
The Invisible Step That Makes or Breaks Your Book
You have written your book. You have edited it. You have a stunning cover. Now you need to turn your manuscript into files that Amazon can actually use – an ebook for Kindle and a print‑ready PDF for paperback.
Formatting is the step most first‑time authors fear. They hear terms like “bleed,” “gutter,” “reflowable ePub,” and “embedded fonts.” They imagine hours of technical struggle.
Here is the good news: formatting is not as hard as it sounds. You can do it yourself with the right tools, or you can hire a professional for a modest fee. Either way, understanding the basics will save you from the embarrassing errors that sink many self‑published books – broken chapter links, text disappearing into the spine, and page numbers that start in the wrong place.
This guide teaches you exactly how to format a book for Kindle and paperback – step by step. You will learn the key differences between ebook and print formatting, how to prepare your manuscript, and the most common mistakes to avoid. We also include a troubleshooting section to help you fix errors when KDP rejects your files.
Let’s turn your manuscript into a professional book.
Kindle vs. Paperback: Two Completely Different Formats
Before you start formatting, you need to understand one critical fact: Kindle and paperback require different files. They are not interchangeable.
Kindle (ebook) format:
- Reflowable text – the reader can change font size, line spacing, and margins.
- No fixed pages – what fits on one screen depends on the device.
- Needs a clickable table of contents (hyperlinks).
- Images at 72‑150 DPI.
- No need for bleed or gutter margins.
Paperback (print) format:
- Fixed layout – every page is exactly as designed.
- Needs correct trim size, margins, gutters, headers, and footers.
- Needs a table of contents with page numbers (not hyperlinks).
- Images at 300 DPI with proper bleed (0.125 inches beyond trim).
- Spine width depends on page count and paper type.
Hardcover (bonus): Similar to paperback but requires a dust jacket or case laminate, wider gutters, and endpapers. We cover this briefly in the bonus section.
You will create two separate files: one for Kindle (.epub or .docx) and one for paperback (print‑ready PDF). This guide covers both.
The Publishing Heaven insight: We have reformatted hundreds of books that authors tried to do themselves. Most errors come from using Microsoft Word incorrectly – or from not understanding the difference between ebook and print requirements. We will show you the right way.
Step-by-Step Formatting for Kindle and Paperback
Before You Start: Prepare Your Manuscript
Formatting works best when your manuscript is clean. Before you open any software, do this preparation. Skipping this step is the #1 cause of formatting failures.
Step A: Remove manual formatting:
- Delete extra spaces (use “Find and Replace” to replace two spaces with one).
- Delete manual tabs (use “Find and Replace” to replace ^t with nothing).
- Delete extra hard returns (replace two paragraph marks with one).
- Use “Show/Hide ¶” in Word to see hidden characters.
Step B: Apply heading styles consistently:
- Use “Heading 1” for chapter titles (e.g., “Chapter 1”).
- Use “Heading 2” for subheadings within chapters.
- Do not manually bold or enlarge chapter titles – use styles.
Step C: Insert page breaks between chapters:
- At the end of each chapter, insert a “Page Break” (not multiple hard returns).
- This ensures each chapter starts on a new page in print and ebook.
Why this matters: Clean manuscript = easier conversion. Taking one hour here saves ten hours of fixing errors later.
Formatting for Kindle (Reflowable Ebook)
Kindle books are the most forgiving. KDP automatically converts your file, but you still need to set it up correctly.
Recommended Workflow for Kindle
Option 1 – DIY with standard word processor (simplest):
- Prepare your manuscript as described above.
- Save as a Word document (.docx).
- Upload directly to KDP. KDP will convert it automatically.
- Test with Kindle Previewer (free download).
Option 2 – Use dedicated formatting software (recommended for multiple books):
- Use professional book formatting tools (one‑time cost $200-$250).
- Import your Word document. The software applies clean, Kindle‑optimized styling.
- Export a clean .epub file. Upload to KDP.
Option 3 – Hire a professional formatter (best for non‑technical authors):
- Cost $150-$300 for a Kindle file.
- You provide your edited manuscript. The formatter delivers a polished .epub.
- You simply upload the file to KDP.
Kindle Formatting Checklist
- Clickable table of contents: KDP can generate this automatically if you used “Heading 1” styles. Check the box in KDP’s upload page.
- No blank pages: Remove extra page breaks at the end.
- Images optimised: Use 72‑150 DPI, RGB color, JPEG format. Keep file size small.
- Fonts: Use standard fonts (Times New Roman, Garamond, Georgia). Do not use decorative fonts – Kindle may not support them.
- Test on multiple devices: Use Kindle Previewer to simulate a Kindle e‑reader, smartphone, and tablet.
Common Kindle Formatting Mistakes (and Fixes)
| Mistake | Fix |
| Using manual tabs or spaces to indent paragraphs | Use “First Line Indent” in paragraph settings (0.2‑0.3 inches) |
| Centering text with the space bar | Use the “Center” alignment button |
| Inserting manual line breaks (Shift+Enter) instead of paragraph breaks | Use “Enter” for new paragraphs |
| Not testing the file before publishing | Always run Kindle Previewer |
Formatting for Paperback (Print‑Ready PDF)
Paperbacks are less forgiving. You must meet KDP’s print specifications exactly. Use the free KDP templates or hire a professional.
Choose Your Trim Size and Paper Type
Trim size (book dimensions):
- Common sizes: 5.5″ x 8.5″, 6″ x 9″, 5″ x 8″.
- Do not choose an unusual size – printing costs may be higher and distribution limited.
- Recommendation for novels: 5.5″ x 8.5″ or 6″ x 9″.
Paper type:
- Cream paper: Off‑white, easier on the eyes, preferred for fiction.
- White paper: Brighter, better for non‑fiction, cookbooks, and photography books.
Actionable step: Download KDP’s paperback template for your chosen trim size. Enter your page count – the template will calculate spine width automatically.
Set Up Your Document Using the KDP Template
Step 1 – Download the template:
- From your KDP dashboard, go to “Help” → “Print Paperback” → “Download Templates.”
- Choose your interior type (e.g., “Fiction”) and trim size.
- The template includes pre‑set margins, gutters, and a sample layout.
Step 2 – Copy your manuscript into the template:
- Paste your text into the template’s body area.
- Do not change margins or page size – the template is already correct.
- Apply “Heading 1” style to chapter titles.
Step 3 – Add front matter and back matter:
- Front matter (before chapter 1): Half‑title page (book title only), title page, copyright page, dedication (optional), table of contents.
- Back matter (after last chapter): About the author, other books by author, acknowledgments.
Step 4 – Insert page numbers:
- Use “Different First Page” if you do not want a page number on the first page of each chapter.
- Front matter often uses roman numerals (i, ii, iii). Body uses Arabic numerals (1, 2, 3).
- In Word, section breaks are required. This is advanced; many authors outsource this step.
Step 5 – Export as print‑ready PDF:
- In Word, go to File → Save As → PDF.
- Select “Best for printing” (not “Minimum size”).
- Ensure “Embed fonts” is checked.
Paperback Formatting Checklist
- Correct trim size (matches template).
- Gutters: Inside margin is larger (0.6‑0.7 inches) to account for binding. Text does not disappear into the spine.
- Headers and footers: Chapter titles on left/right pages correctly.
- Page numbers: Start at 1 on the first page of chapter one (not on title page).
- Table of contents: Page numbers match actual locations.
- Images: 300 DPI, CMYK color. Extend images 0.125 inches beyond trim (bleed) if they go to the edge.
- Fonts: Embedded in the PDF.
- Proof copy ordered: Always order a physical proof before publishing. A $5 proof copy saves you from 100 bad reviews.
Common Paperback Formatting Mistakes (and Fixes)
| Mistake | Fix |
| Using Microsoft Word without a template | Always use KDP’s free templates. |
| Ignoring the gutter | Inside margin must be 0.6‑0.7 inches. |
| Not embedding fonts | When saving as PDF, check “Embed fonts.” |
| Not ordering a proof copy | Order one physical copy. Inspect every page. |
| Wrong page numbering (copyright page shows “Page 1”) | Use section breaks. Front matter = roman numerals; body = Arabic 1. |
Troubleshooting: What to Do When KDP Rejects Your Files
KDP’s upload process includes an automatic validation check. If it rejects your file, it will show an error message. Here is how to fix the most common rejections.
Error: “Cover file dimensions do not meet minimum requirements.”
- Cause: Your cover image is too small or has the wrong aspect ratio.
- Fix: For ebook, the short side must be at least 1,600 pixels. For paperback, use KDP’s cover template generator.
Error: “Fonts not embedded.”
- Cause: You saved the PDF without embedding fonts.
- Fix: When saving as PDF, check “Embed fonts” in the export options.
Error: “Text falls outside the printable area.”
- Cause: Your margins are too small, or you placed text too close to the trim edge.
- Fix: Use KDP’s template. Do not change margins manually.
Error: “Missing or incorrect table of contents.”
- Cause: For ebooks, you did not use “Heading 1” styles. For print, the TOC page numbers do not match.
- Fix: Apply heading styles and re‑generate TOC.
Error: “Images are low resolution.”
- Cause: You used images that are too small (less than 300 DPI for print).
- Fix: Replace images with high‑resolution versions.
Actionable step: Read the error message carefully. It usually tells you exactly what is wrong. If you are still stuck, hire a professional formatter to fix the file.
Comparison Table – DIY vs. Professional Formatting
| Approach | Cost | Time | Quality Risk | Best For |
| DIY with Word + KDP template | $0 | 10‑20 hours | High (errors common) | Technically confident only |
| DIY with formatting software | $200-$250 one‑time | 10‑20 hours (learning + formatting) | Low (if you learn properly) | Authors planning multiple books |
| Hire a professional formatter | $300-$700 (Kindle + paperback) | 1‑3 weeks (you do nothing) | Very low | Most first‑time authors |
Recommendation for most beginners: Hire a professional formatter. The cost is a few hundred dollars. The peace of mind and error‑free files are worth it.
The Publishing Heaven note: We offer professional formatting for Kindle and paperback. Our team uses industry‑standard software and tests your files before delivery. We also provide one round of revisions. Contact us for a quote.
Bonus Section: Formatting for Hardcover
Hardcovers are increasingly popular for non‑fiction, gift books, and series. KDP now offers hardcover printing.
Additional requirements for hardcover:
- Dust jacket or case laminate: Dust jacket requires flaps; case laminate prints directly on the cover.
- Wider gutters: Hardcover binding needs a larger inside margin (0.8‑1.0 inches).
- Endpapers: The first and last pages of the interior are sometimes colored or patterned.
- Spine width: Calculated differently because of thicker boards.
Recommendation: Use KDP’s hardcover template. It is similar to the paperback template but with adjusted settings. If you are already struggling with paperback, outsource hardcover formatting separately.
Expert Insights: How to Avoid the Most Common Formatting Disasters
Disaster 1: Text disappears into the gutter.
Prevention: Use KDP’s template and never change margins.
Disaster 2: Chapter headings appear at the bottom of a page (orphan).
Prevention: Use “Page Break Before” in the paragraph settings for your chapter heading style.
Disaster 3: Ebook table of contents is not clickable.
Prevention: In KDP, check the box “Enable Table of Contents” and ensure you used “Heading 1” styles for chapter titles.
Disaster 4: Images are blurry or pixelated.
Prevention: For Kindle: 72‑150 DPI. For print: 300 DPI. Do not enlarge small images.
Disaster 5: Page numbering is wrong (copyright page shows “Page 1”).
Prevention: Use section breaks. Front matter uses roman numerals; body starts with Arabic 1. Outsource if unsure.
Disaster 6 – Hardcover spine text is upside down or too small.
Prevention: Use KDP’s cover template generator. It calculates spine width and shows text orientation.
Examples / Use Cases: Real Formatting Success Stories
Use Case 1: The Author Who Used KDP’s Template Correctly
Before: Maria formatted her novel in Word without a template. The proof copy had text in the gutter and page numbers starting on the copyright page.
What she did: She downloaded KDP’s 6″ x 9″ paperback template. She copied her manuscript into the template, adjusting only the font and paragraph styles. She saved as PDF with embedded fonts.
After: The second proof copy was flawless. She published without issues. Maria says, “The template saved me. I would have given up without it.”
Use Case 2: The Author Who Hired a Formatter
Before: Tom wrote a 400‑page business book. He tried formatting in Word for three weeks and kept getting errors.
What he did: He hired a professional formatter ($600) for Kindle and paperback. The formatter delivered both files in five days.
After: Tom uploaded the files to KDP. The previewer showed zero errors. He says, “Paying a formatter was the best money I spent. I saved weeks of frustration.”
Use Case 3: The Author Who Skipped Proof Copies
Before: Lisa formatted her own romance novel using dedicated formatting software. She was confident, so she skipped ordering a proof copy.
After: A reader posted a one‑star review: “Pages 78‑82 are blank.” The error was there, but Lisa never saw it.
Lesson: Lisa had to unpublish, fix the file, and republish. She lost momentum and reviews. She says, “A $5 proof copy would have saved me. Never skip it.”
Use Case 4: The Author Who Used Formatting Software Correctly
Before: David wrote a 300‑page science fiction novel. He was intimidated by Word but technically comfortable.
What he did: He purchased dedicated book formatting software ($200 one‑time). He spent two weekends learning the interface. He imported his Word manuscript, applied a clean theme, and exported .epub and PDF files.
After: The files passed KDP’s preview with no errors. David says, “The software paid for itself with one book. I will use it for all my future books.”
Conclusion: Formatting Is Learnable – Or Outsourceable
You do not need to be a professional designer to format a book. With the right templates and tools – or by hiring a professional – you can produce clean, professional files for Kindle and paperback.
Your action plan:
- Prepare your manuscript: Remove manual formatting, apply heading styles.
- Decide on your approach: DIY with template, DIY with formatting software, or hire a pro.
- Follow the checklists for Kindle and paperback.
- Test your Kindle file with Kindle Previewer.
- Order a paperback proof copy – always.
- Fix any errors and re‑upload.
- Publish only when flawless.
Your book’s interior should be as professional as its cover. Do not let poor formatting destroy your reader’s experience.
FAQs: Formatting a Book for Kindle and Paperback
Q: Can I use the same file for Kindle and paperback?
No. Kindle uses a reflowable .epub or .docx. Paperback uses a fixed‑layout print‑ready PDF. They are different files.
Q: Do I need to buy expensive software like Adobe InDesign?
No. You can use KDP’s free templates and Word, or low‑cost dedicated formatting tools ($200-$250 one‑time). You can also hire a formatter.
Q: What is the most common formatting mistake?
Using Microsoft Word without a template. Word’s default margins and gutters are wrong for print books.
Q: How long does formatting take?
DIY: 10‑20 hours for a 300‑page book. Professional formatter: 1‑3 weeks (but zero hours of your time). Learning dedicated software: 2‑4 weeks.
Q: How does KDP’s paperback template work?
Download the template, paste your manuscript into it, and save as PDF. The template already has correct trim size, margins, gutters, and spine calculation.
Q: What is bleed, and why do I need it?
Bleed is the extra 0.125 inches of image that extends beyond the trim edge. It ensures that color and images print to the very edge of the page without white lines.
Q: Does The Publishing Heaven offer formatting services?
Yes. The Publishing Heaven provides professional formatting for Kindle and paperback. We handle margins, gutters, bleed, font embedding, and table of contents. We also test your files on multiple devices. Contact us for a quote.
Strong Call-to-Action (CTA)
You now know how to format your book for Kindle and paperback – or how to hire the right professional. At The Publishing Heaven, we make formatting simple. Our team delivers clean, error‑free files ready for KDP. We also provide cover design, editing, and complete publishing packages.
We are a premium, one‑stop publishing solutions company. Do not let formatting nightmares delay your book. Let us handle the technical work so you can focus on writing.
Ready to get your book formatted professionally?
Visit The Publishing Heaven today to schedule your free formatting consultation. Let’s turn your manuscript into a professional Kindle and paperback book.